Export from Langfuse Cloud
Follow this guide to configure a Blob Storage integration in Langfuse Cloud for scheduled exports. You can schedule exports of your trace data to object storage as often as every20 minutes or on an hourly, daily, or weekly schedule. By default, each export contains your observations (enriched with trace attributes) and scores.
Exported file layout
The Blob Storage integration in Langfuse Cloud writes data to the target bucket or storage container using the following directory structure:Import into ClickHouse Cloud
Once a Blob Storage integration is configured in Langfuse Cloud, trace data will be exported to the target bucket or storage container on a schedule. To import that data into ClickHouse Cloud, you can use ClickPipes and its managed object storage connectors:| Data source | Details |
|---|---|
 Amazon S3 Amazon S3and S3-compatible object stores | Integrate using S3 ClickPipes. |
 Google Cloud Storage Google Cloud Storage | Integrate using GCS ClickPipes. |
 Azure Blob Storage Azure Blob Storage | Integrate using ABS ClickPipes. |
Create a ClickPipe
This example uses the S3 ClickPipe to import data from an S3 bucket receiving scheduled exports from Langfuse Cloud, and can be used as a blueprint for all object storage export targets. For data source-specific guidance, see the ClickPipes documentation.1
Select the data source
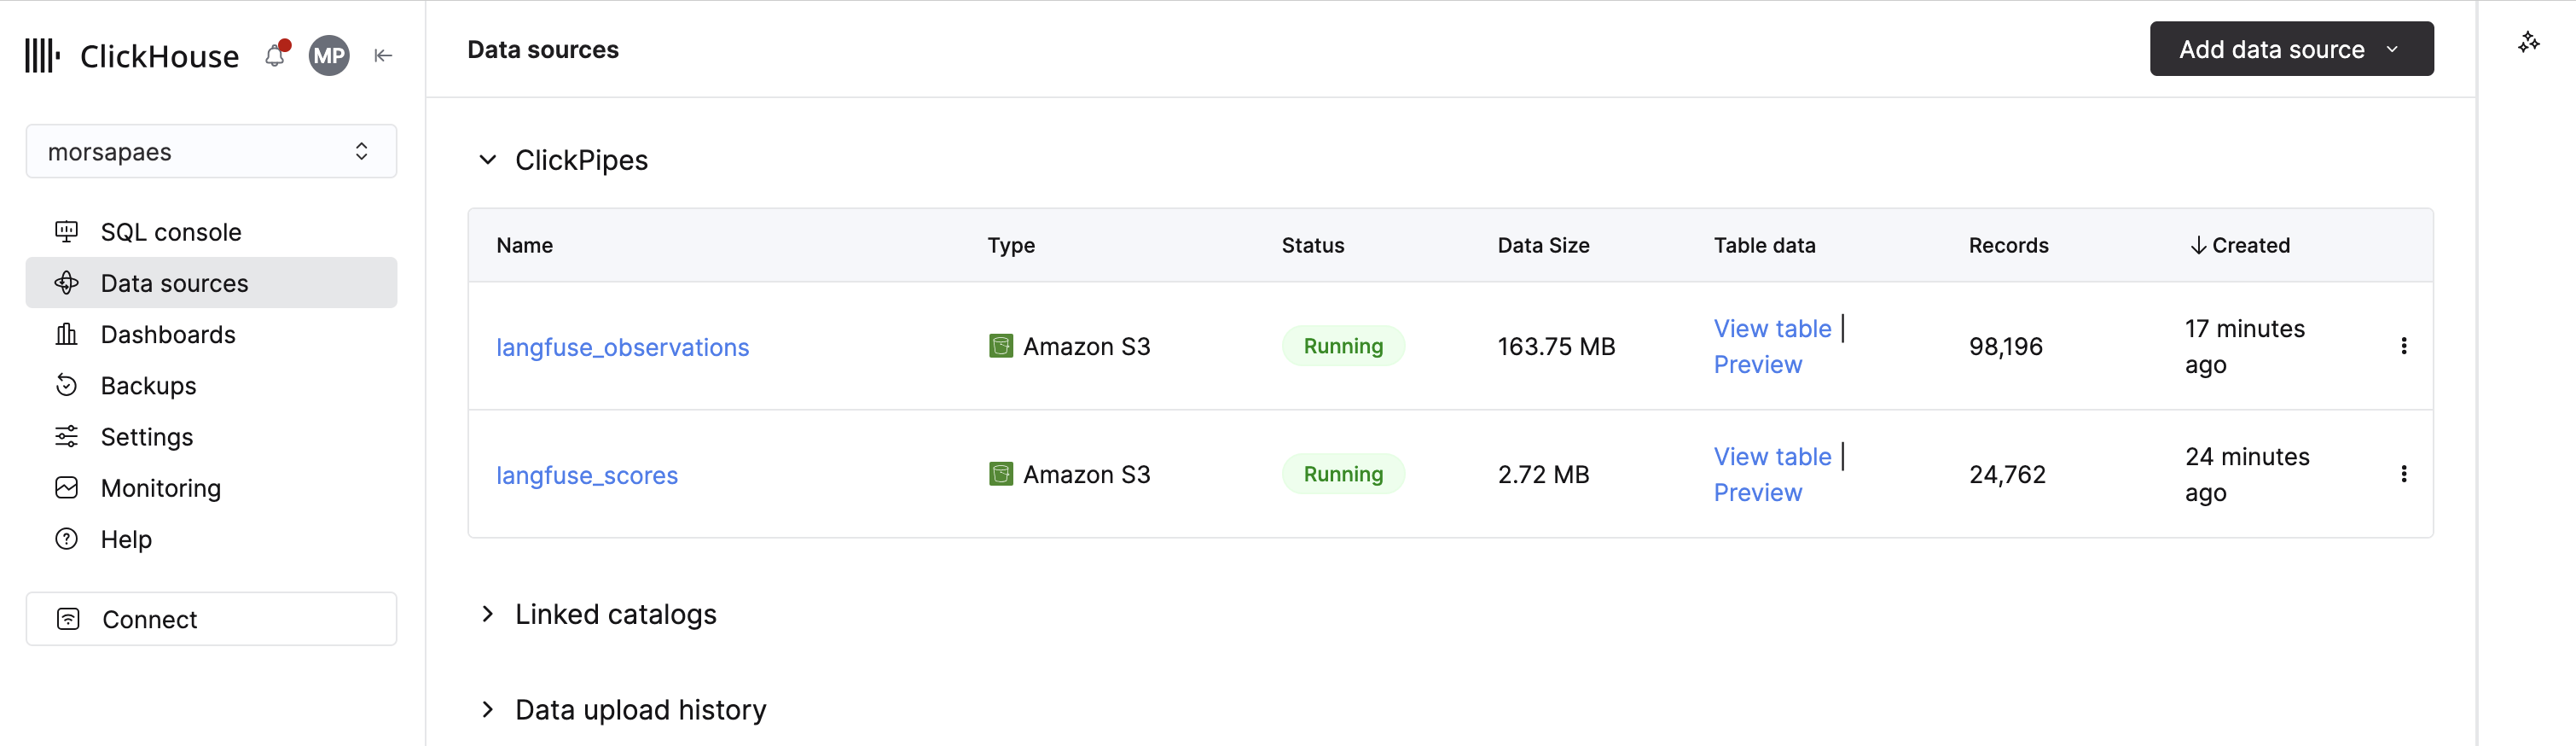
1. In ClickHouse Cloud, select Data sources in the main navigation menu and click Create ClickPipe.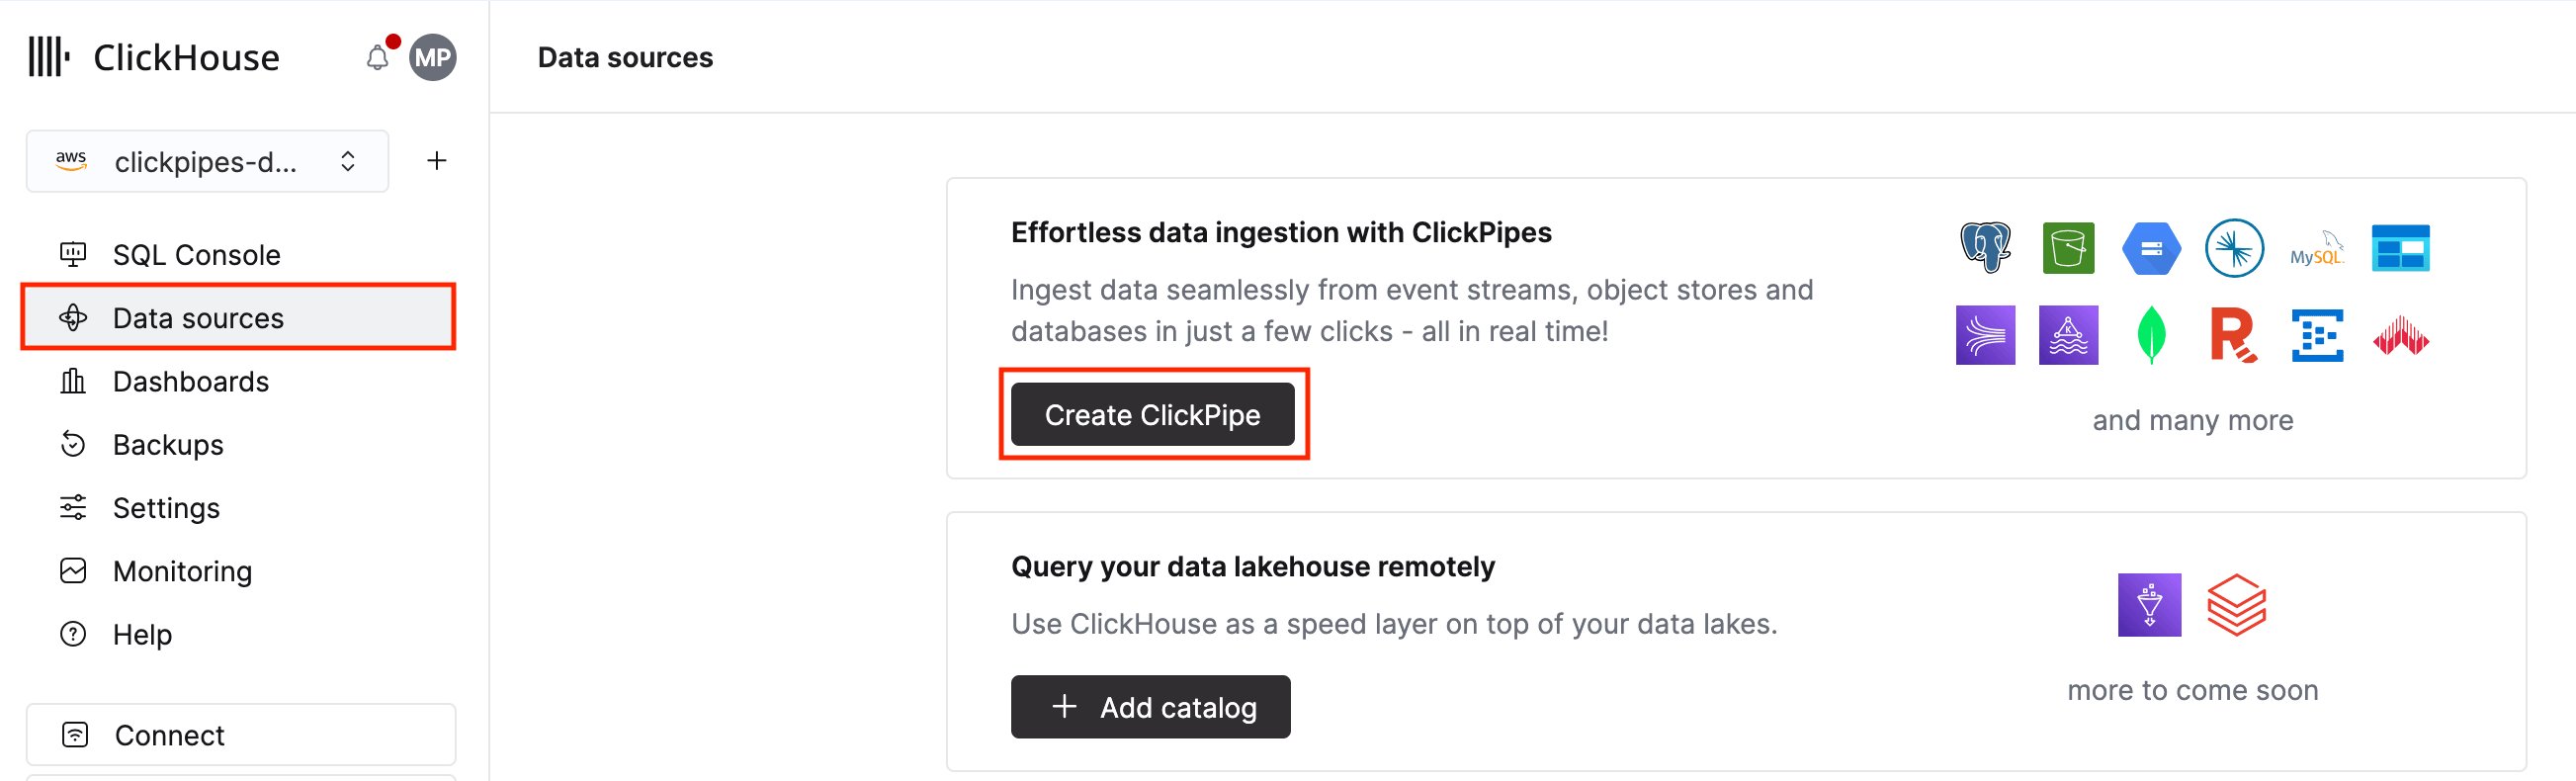
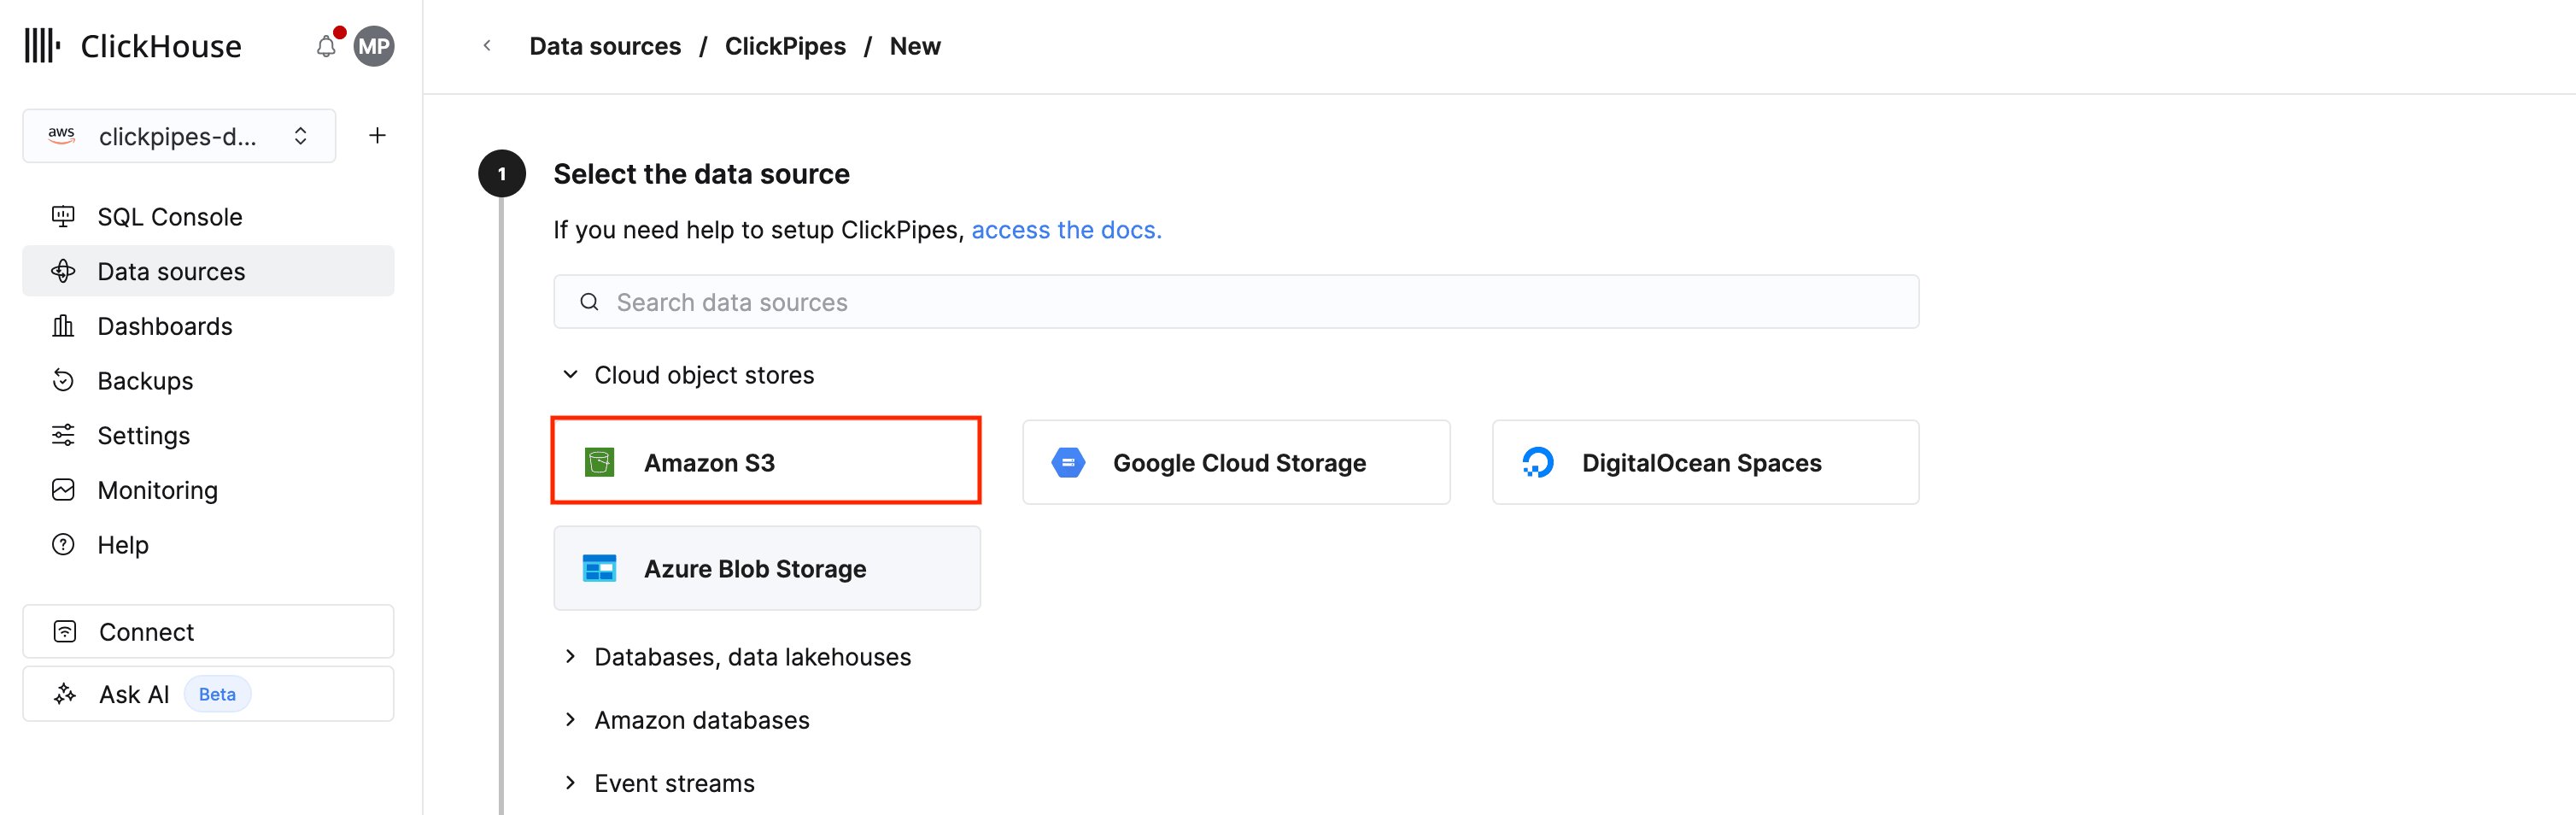
2
Set up the connection
1. Fill in the details ClickPipes needs to connect to and authenticate with the bucket receiving your Langfuse Cloud exports.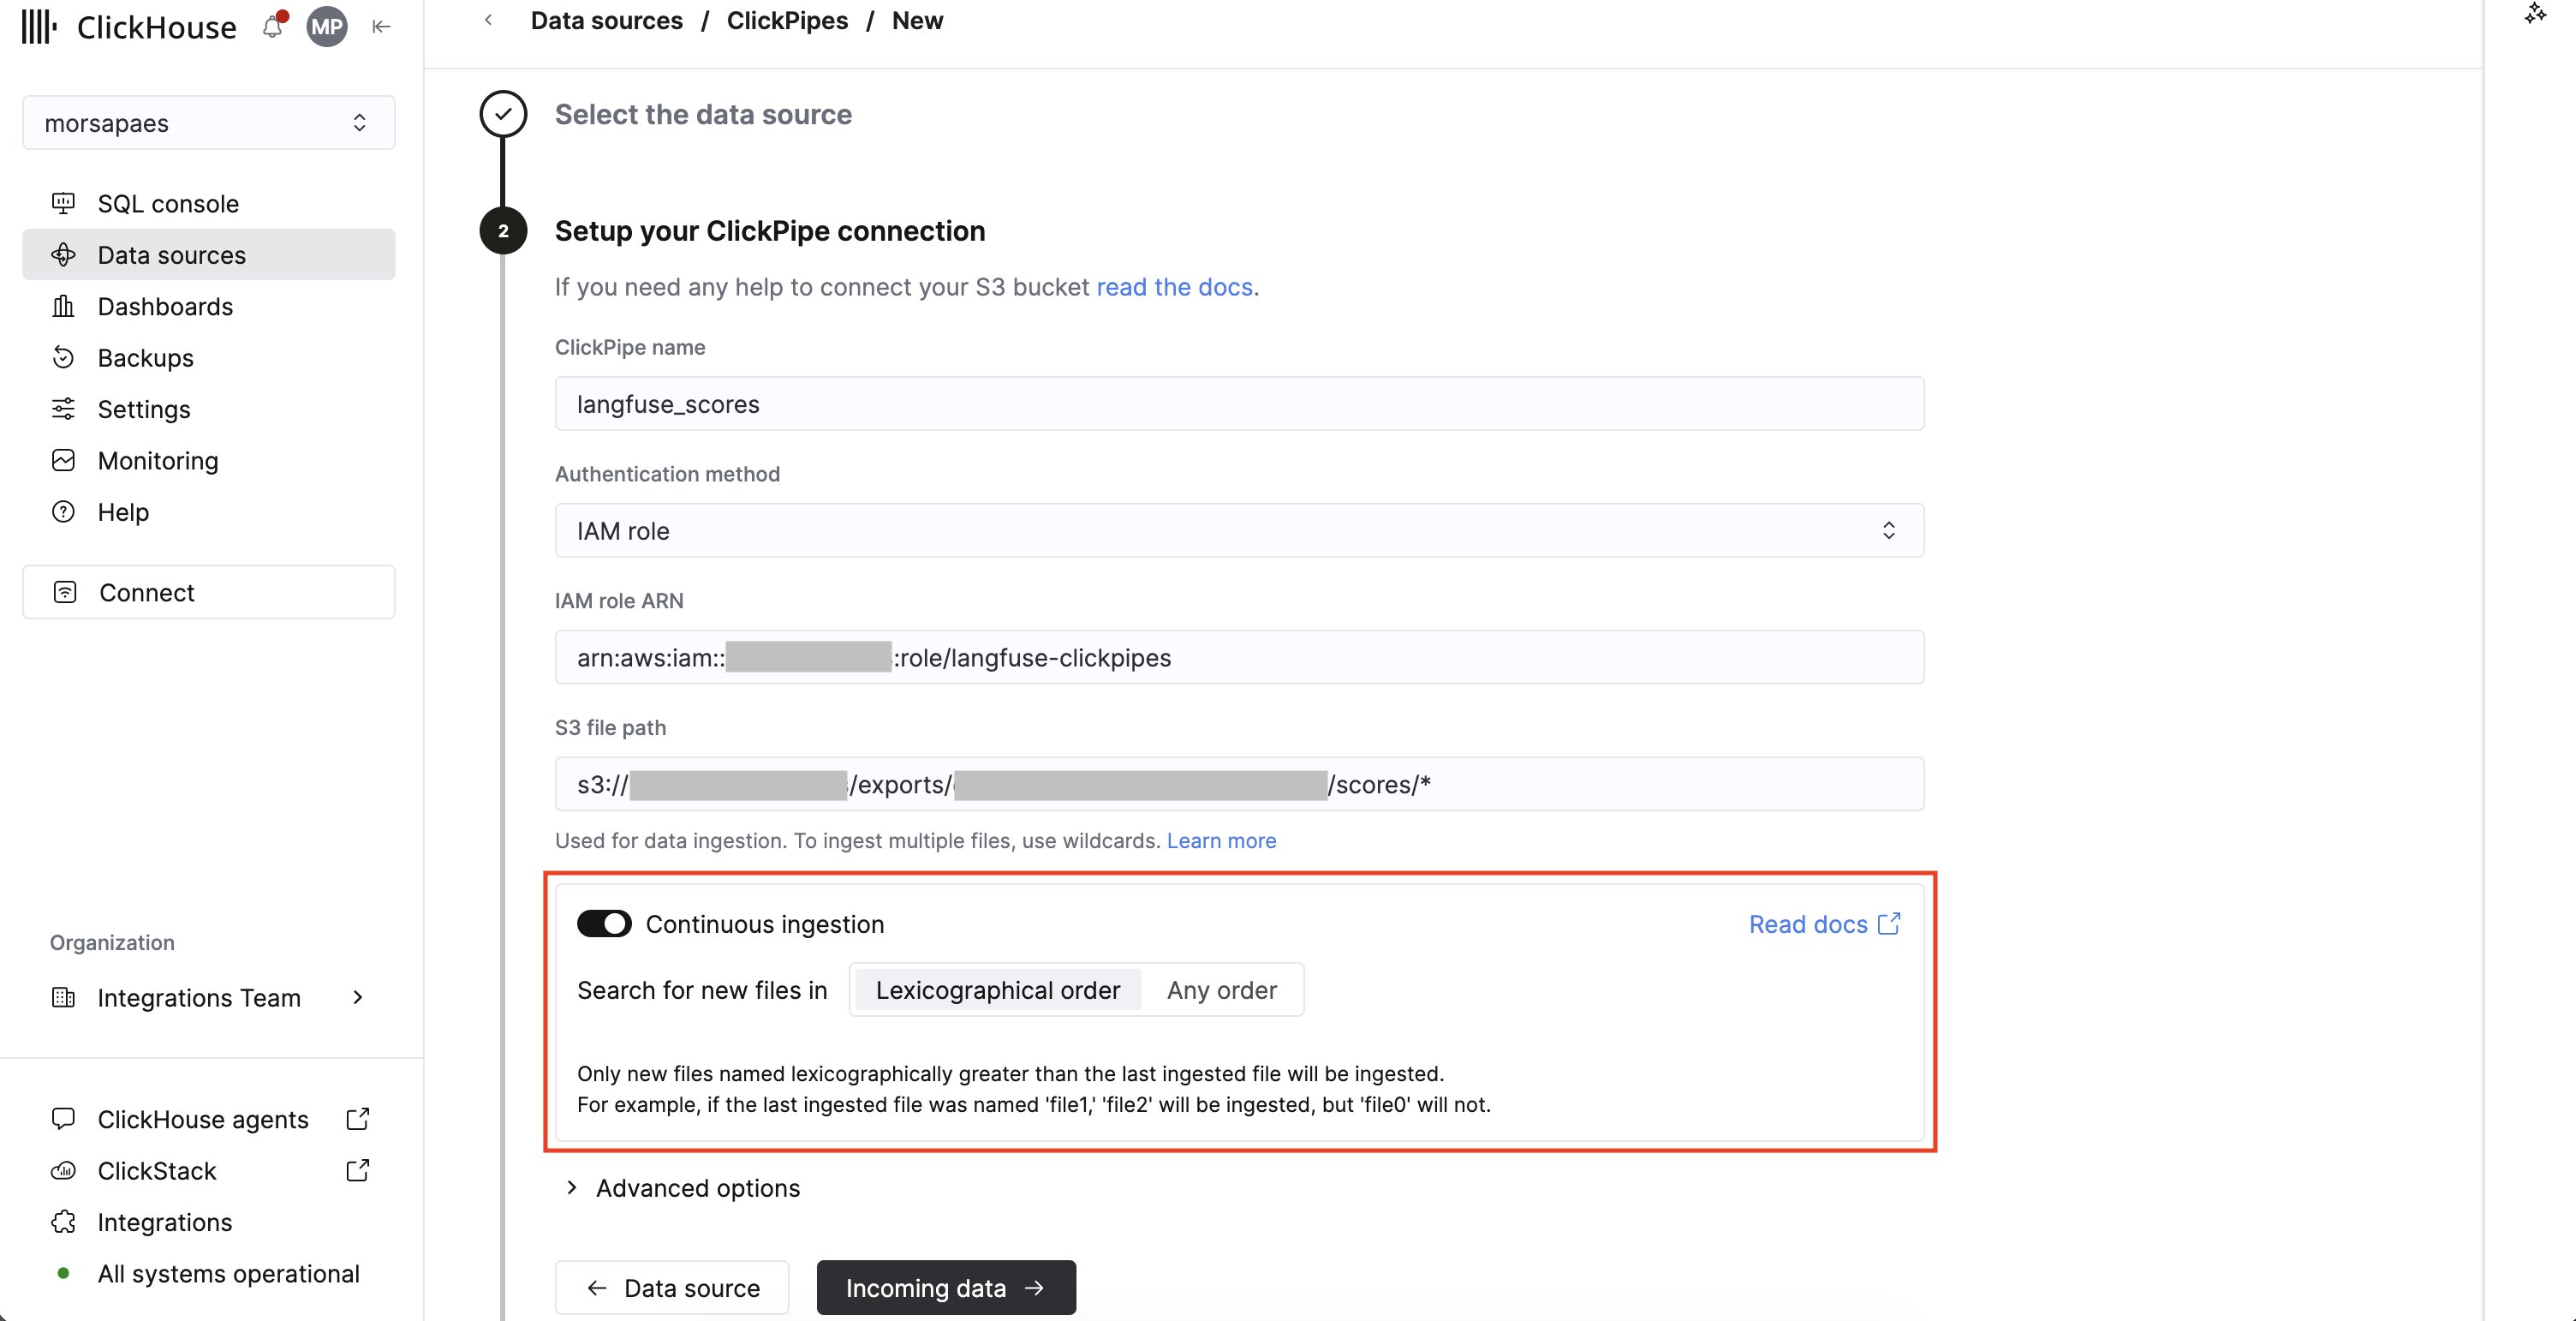
-
Authentication method: the S3 ClickPipe supports IAM credentials (
Credentials) and IAM role-based authentication (IAM role). ClickPipes only needs read access to the bucket. See the reference documentation for guidance on authentication and permissions. -
S3 file path: point the ClickPipe at a sub-directory and use a
*wildcard to match every exported file. You must create one ClickPipe per sub-directory, given that the exported files under each sub-directory have different schemas.See the reference documentation for guidance on supported patterns, including how to match files across nested prefixes.
3
Validate incoming data
1. ClickPipes will connect to your bucket and list the files in the specified path, inferring the file format. In this example, we used the default export file format in Langfuse Cloud (Parquet).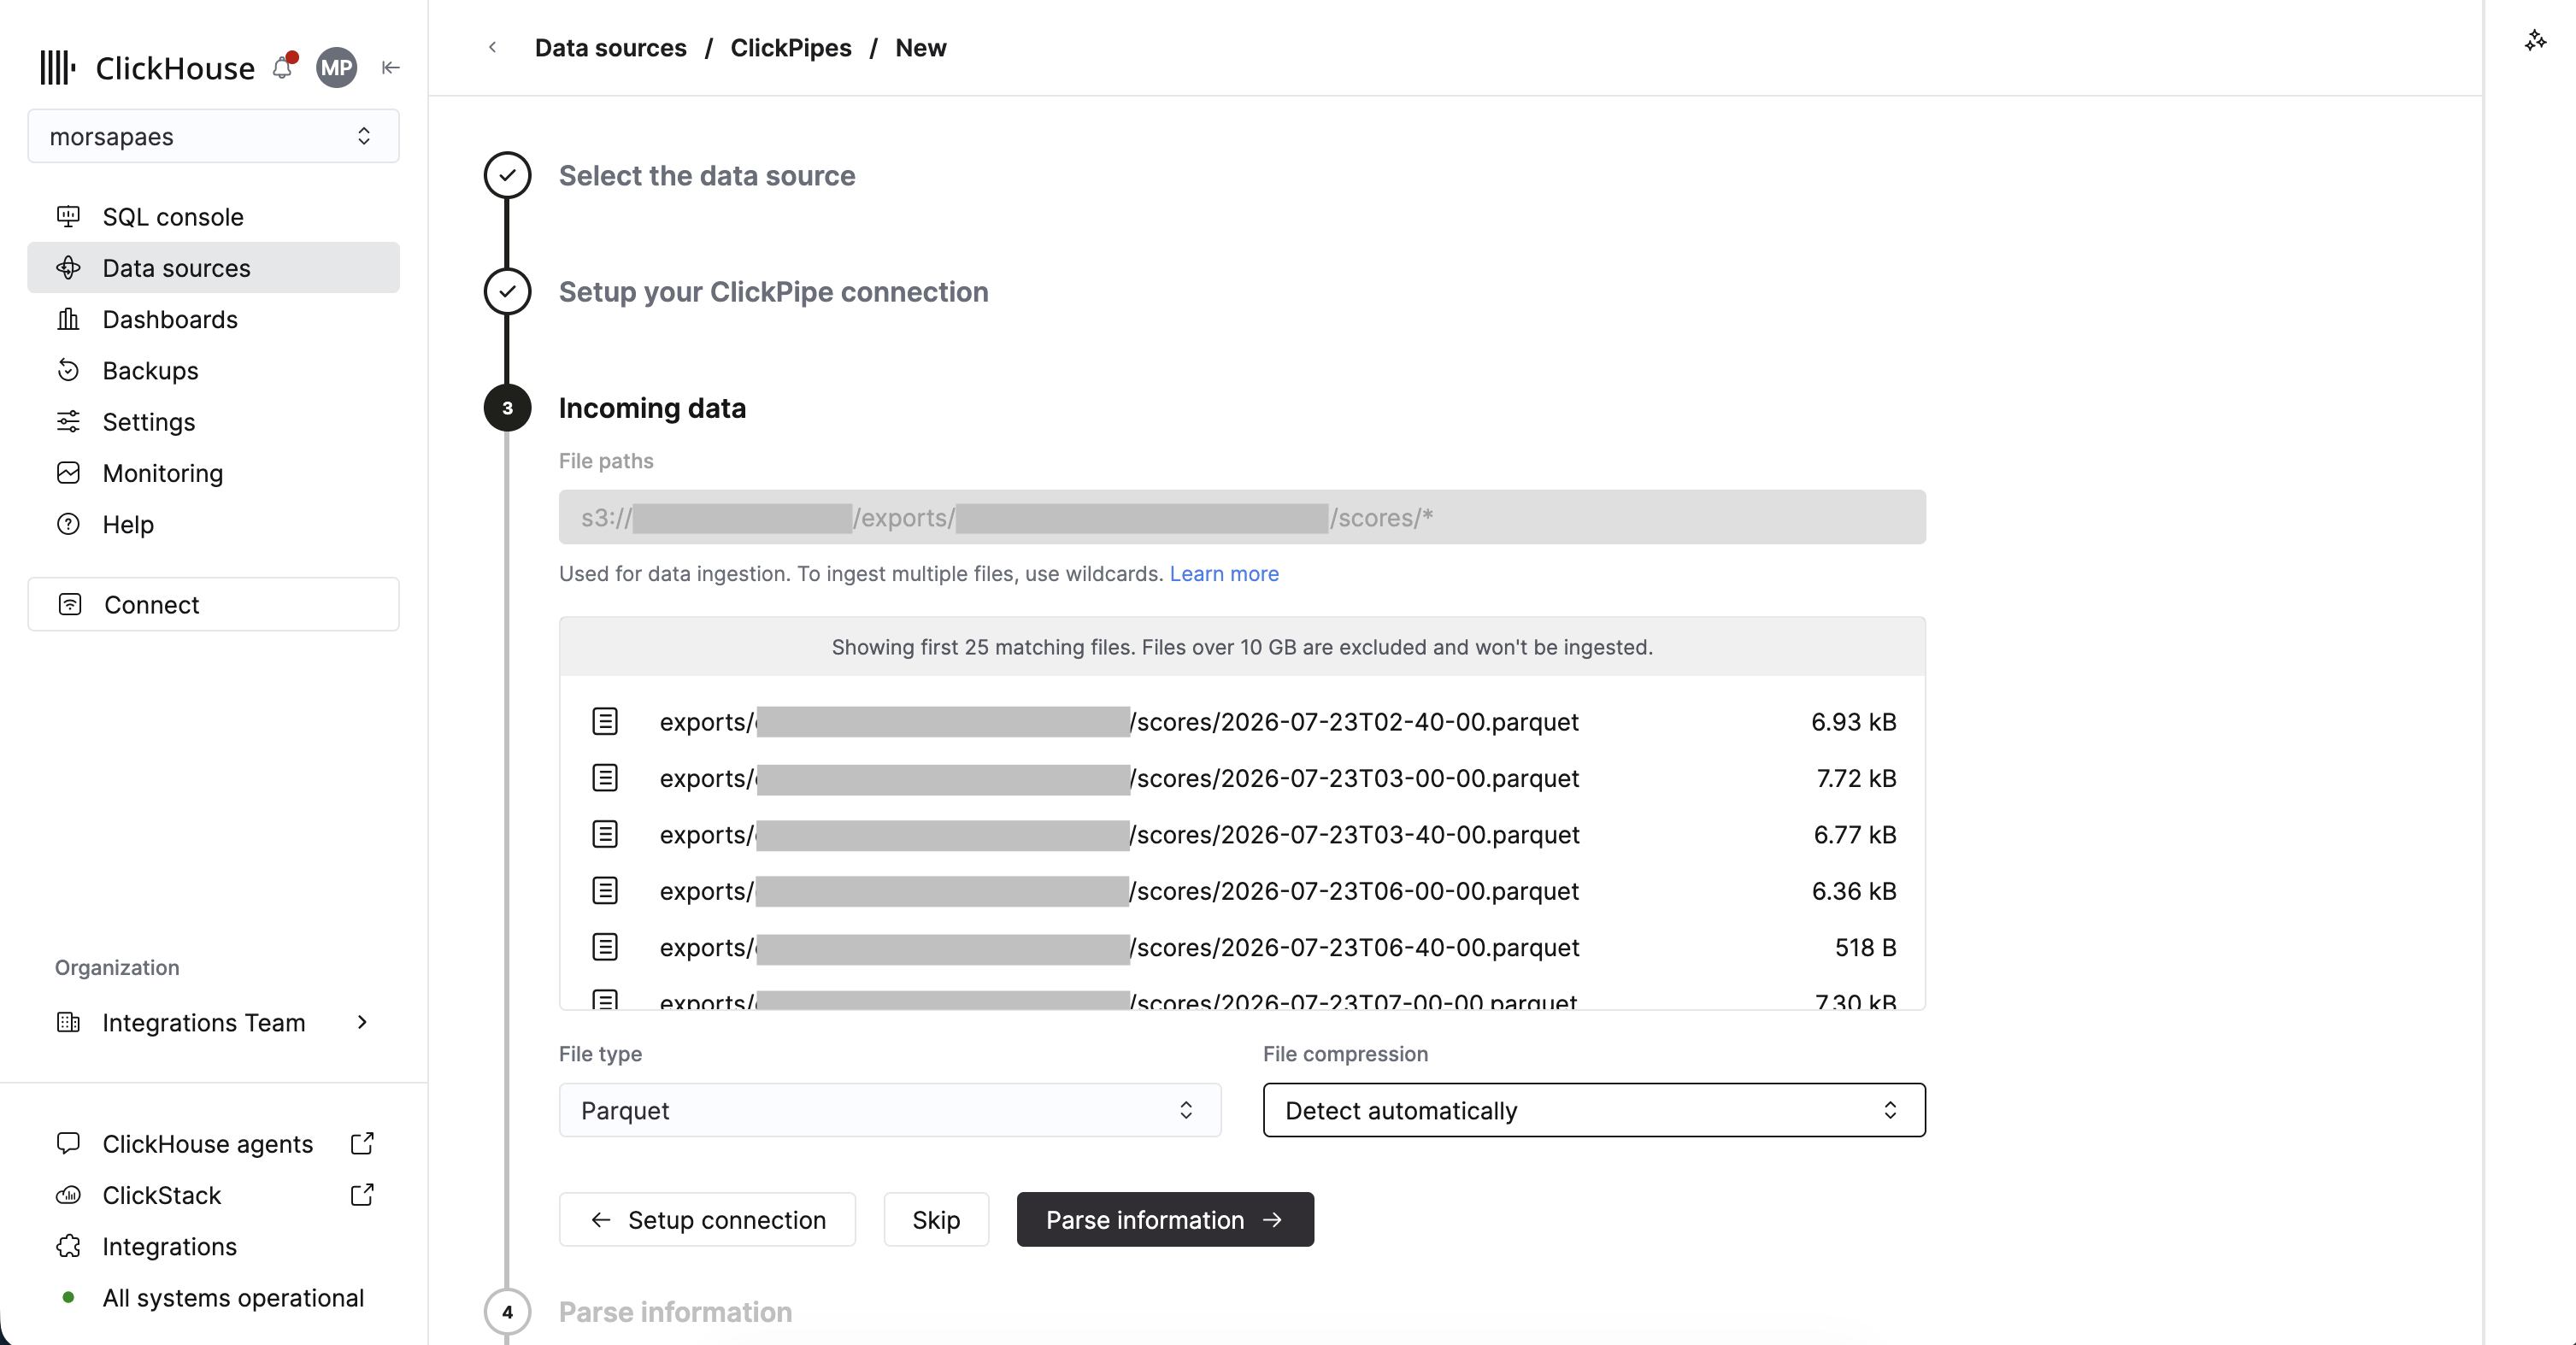
4
Configure the target
1. In this step, you can review the inferred schema and customize the configuration of the target table, including adjusting the data type mapping, defining the sorting key, and choosing the table engine.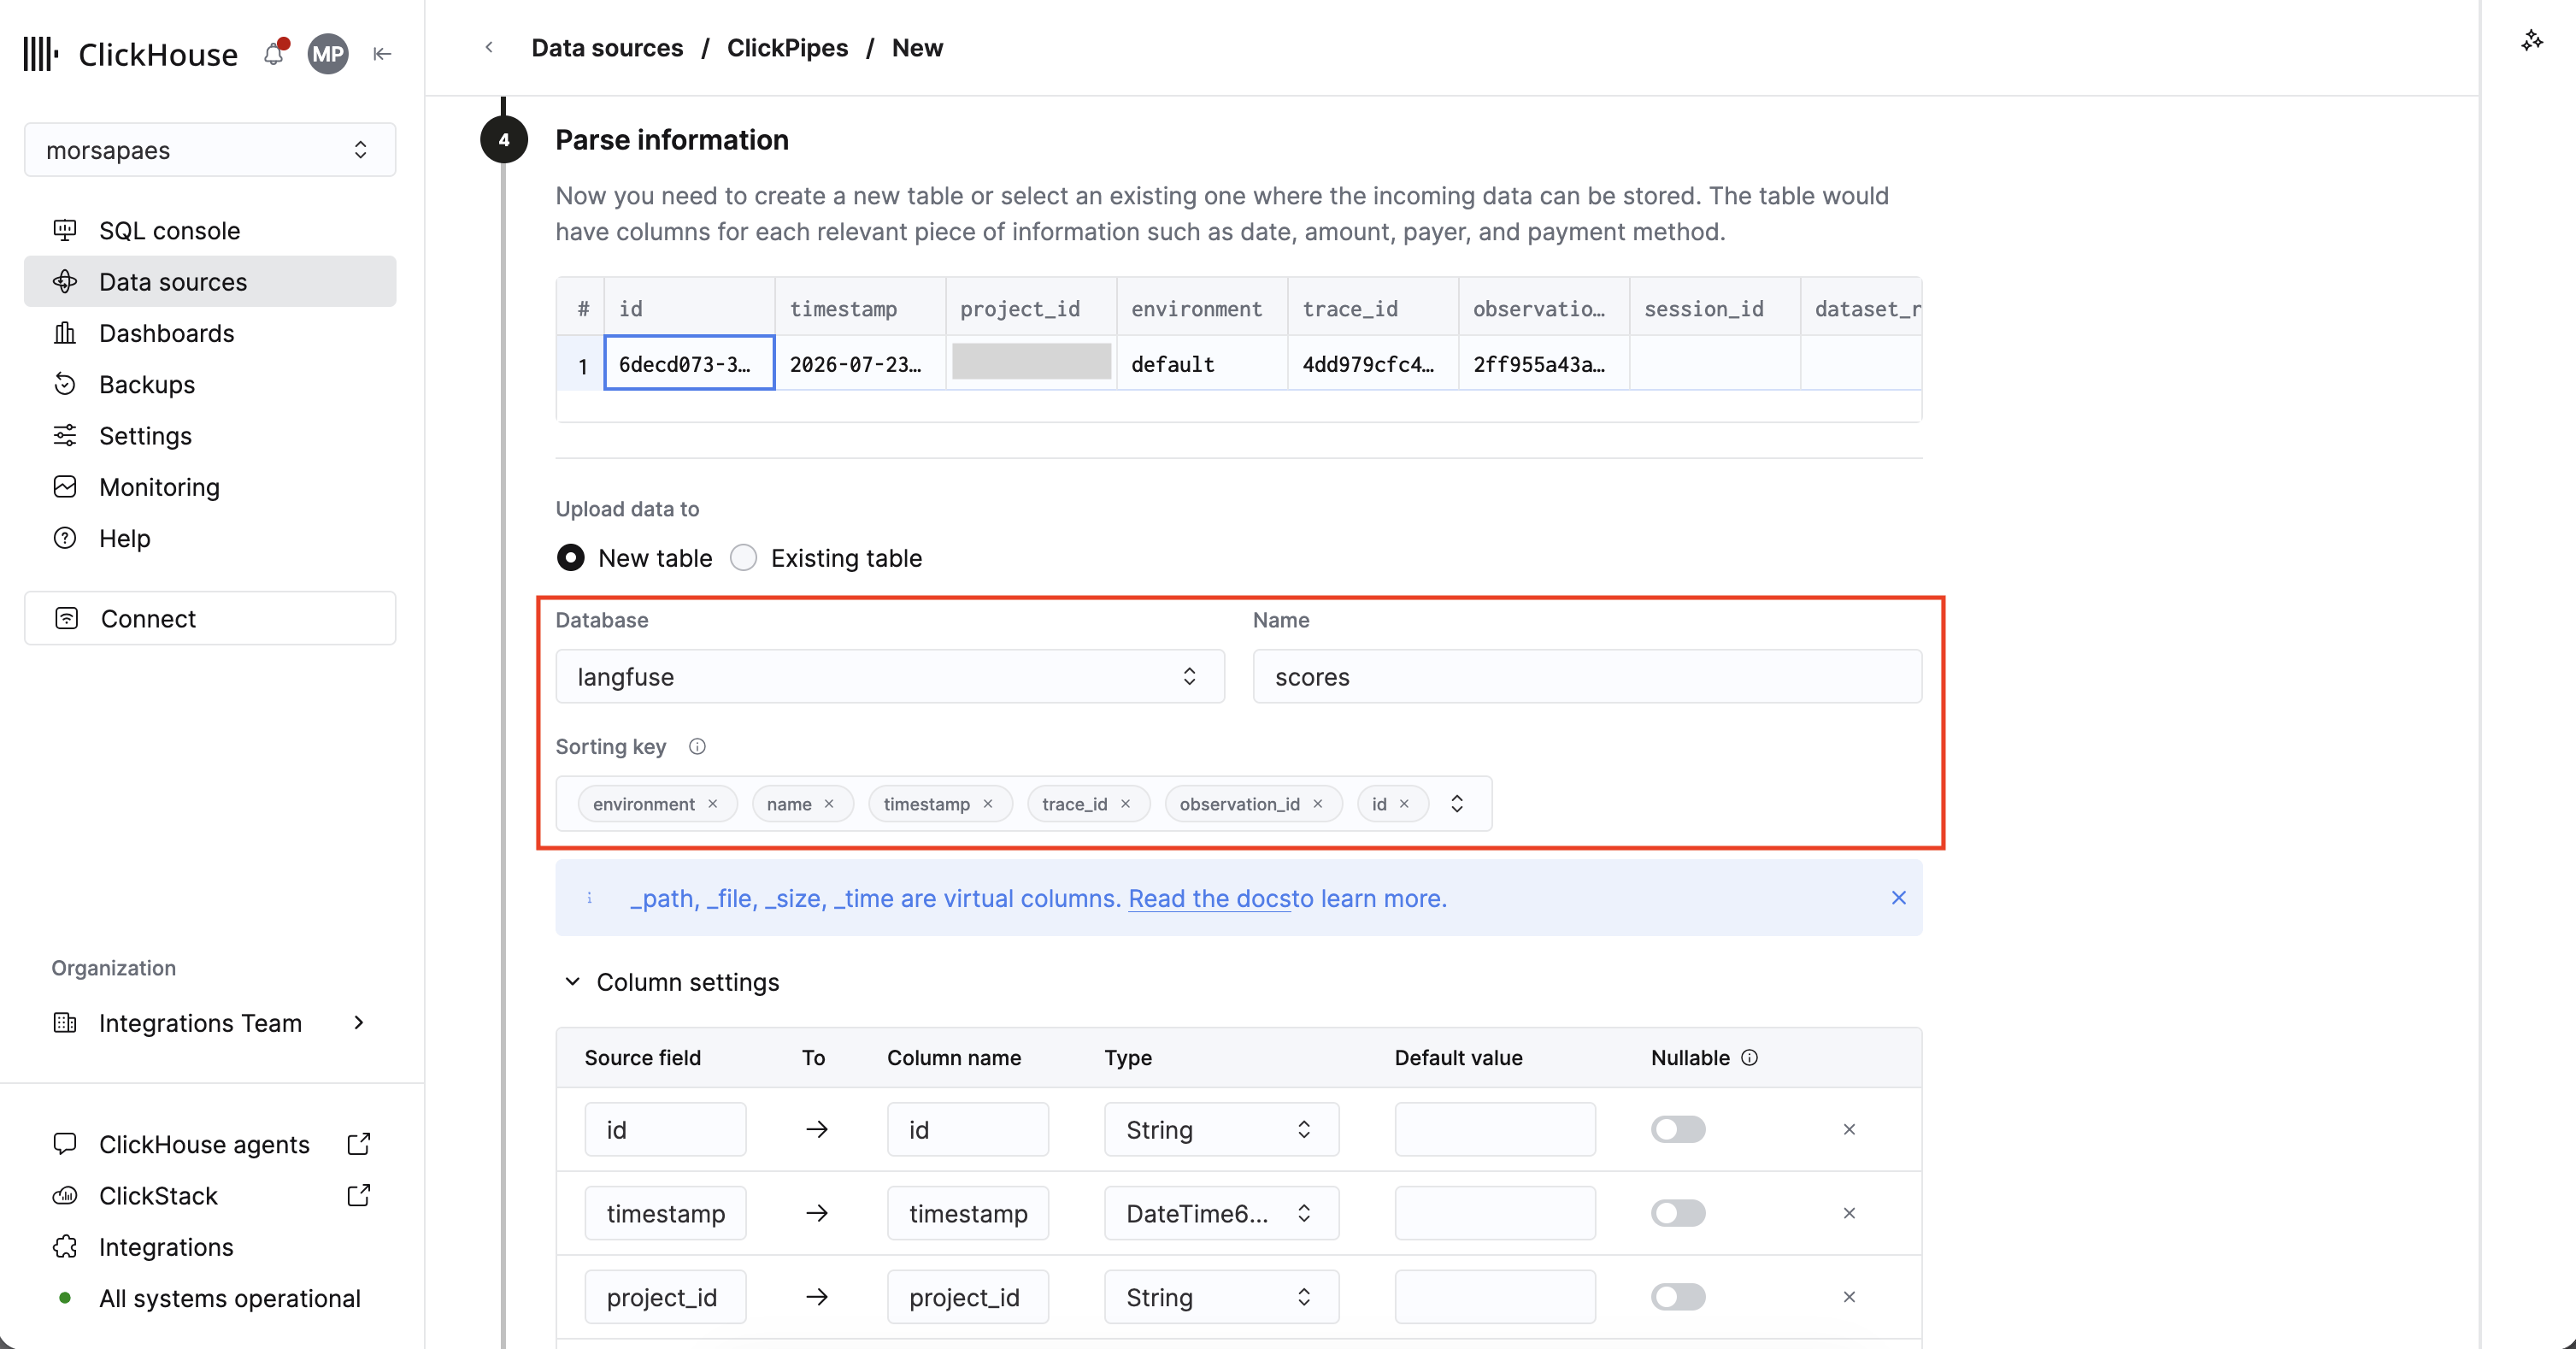
-
Database and Name: a dedicated database for your Langfuse data (e.g.,
langfuse) and a human-readable name for the destination table (e.g.,scores). ClickPipes defaults to thedefault.s3-<uuid>to avoid naming collisions. -
Sorting key: the ordering key of the destination table, which determines how ClickHouse persists the data on disk. For optimal performance, the sorting key should match your data access patterns so that queries can skip reading as much data as possible.
This key is also used for de-duplication in
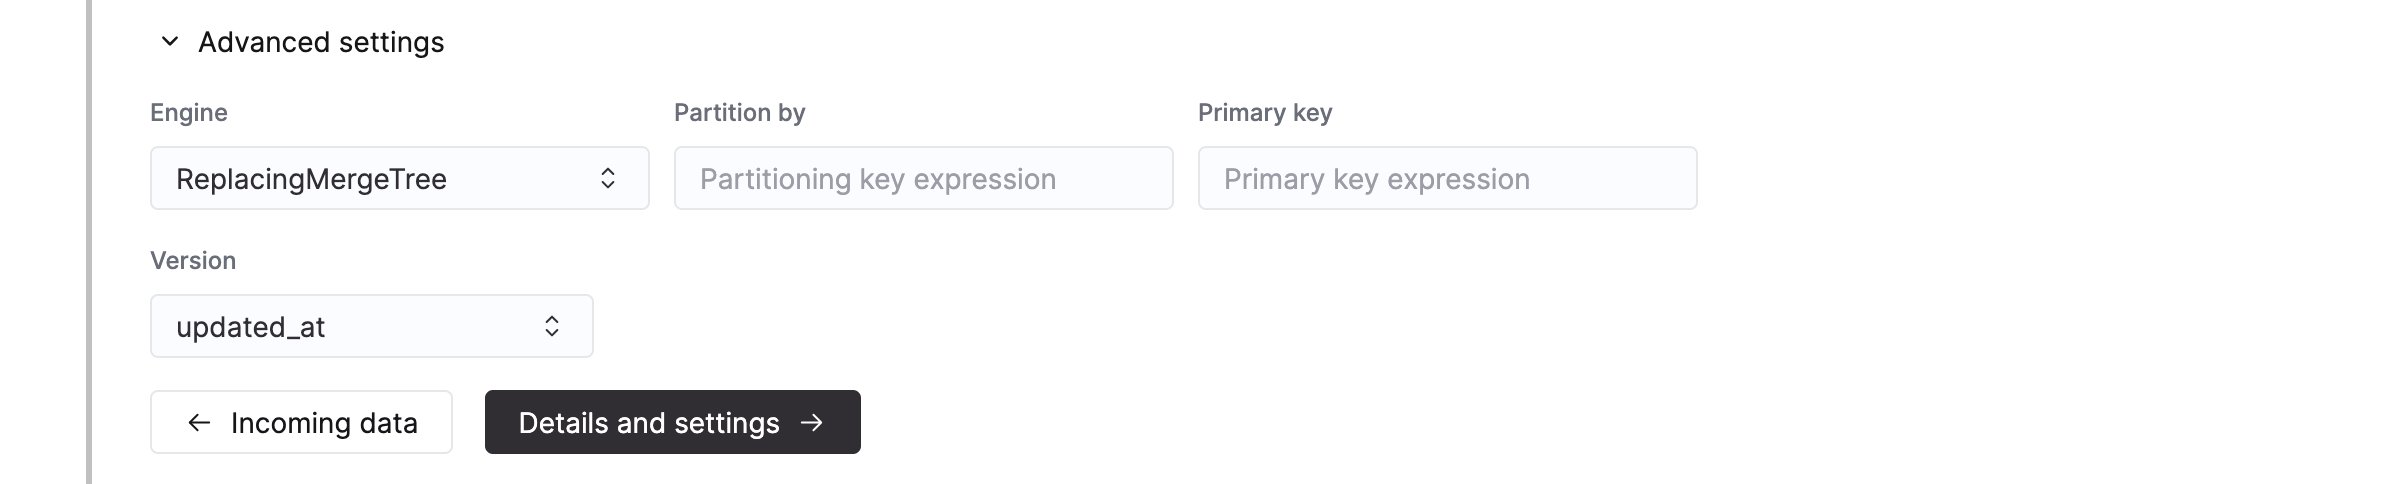
ReplacingMergeTreetables, so the set of columns must also uniquely identify a record. If you load multiple Langfuse projects into one table, prependproject_idto the sorting key. See the reference documentation for guidance on choosing a sorting key. -
Partition by: leave blank unless you plan to expire old traces. Partitioning in ClickHouse is used for data management, rather than query optimization; the suggested sorting key already prunes time-range queries. If you do need retention, partition by the time column (
toYYYYMM(start_time), ortoYYYYMM(timestamp)forscores) so that expiring a month of traces is a singleDROP PARTITIONoperation.
ReplacingMergeTree to ensure deduplication, using updated_at as the Version column.uniq(), max(), min()), you must handle deduplication as part of the downstream data model using ReplacingMergeTree as the target engine.Deduplicate with ReplacingMergeTreeThis table engine collapses duplicates using background merges. For full de-duplication on read (i.e., merge-on-read semantics), you must use the
FINAL modifier (or argMax()-style aggregations) at query time.5
Configure permissions
ClickPipes creates a dedicated user for writing data into the destination table. Select a role for this internal user using a custom role or one of the predefined roles: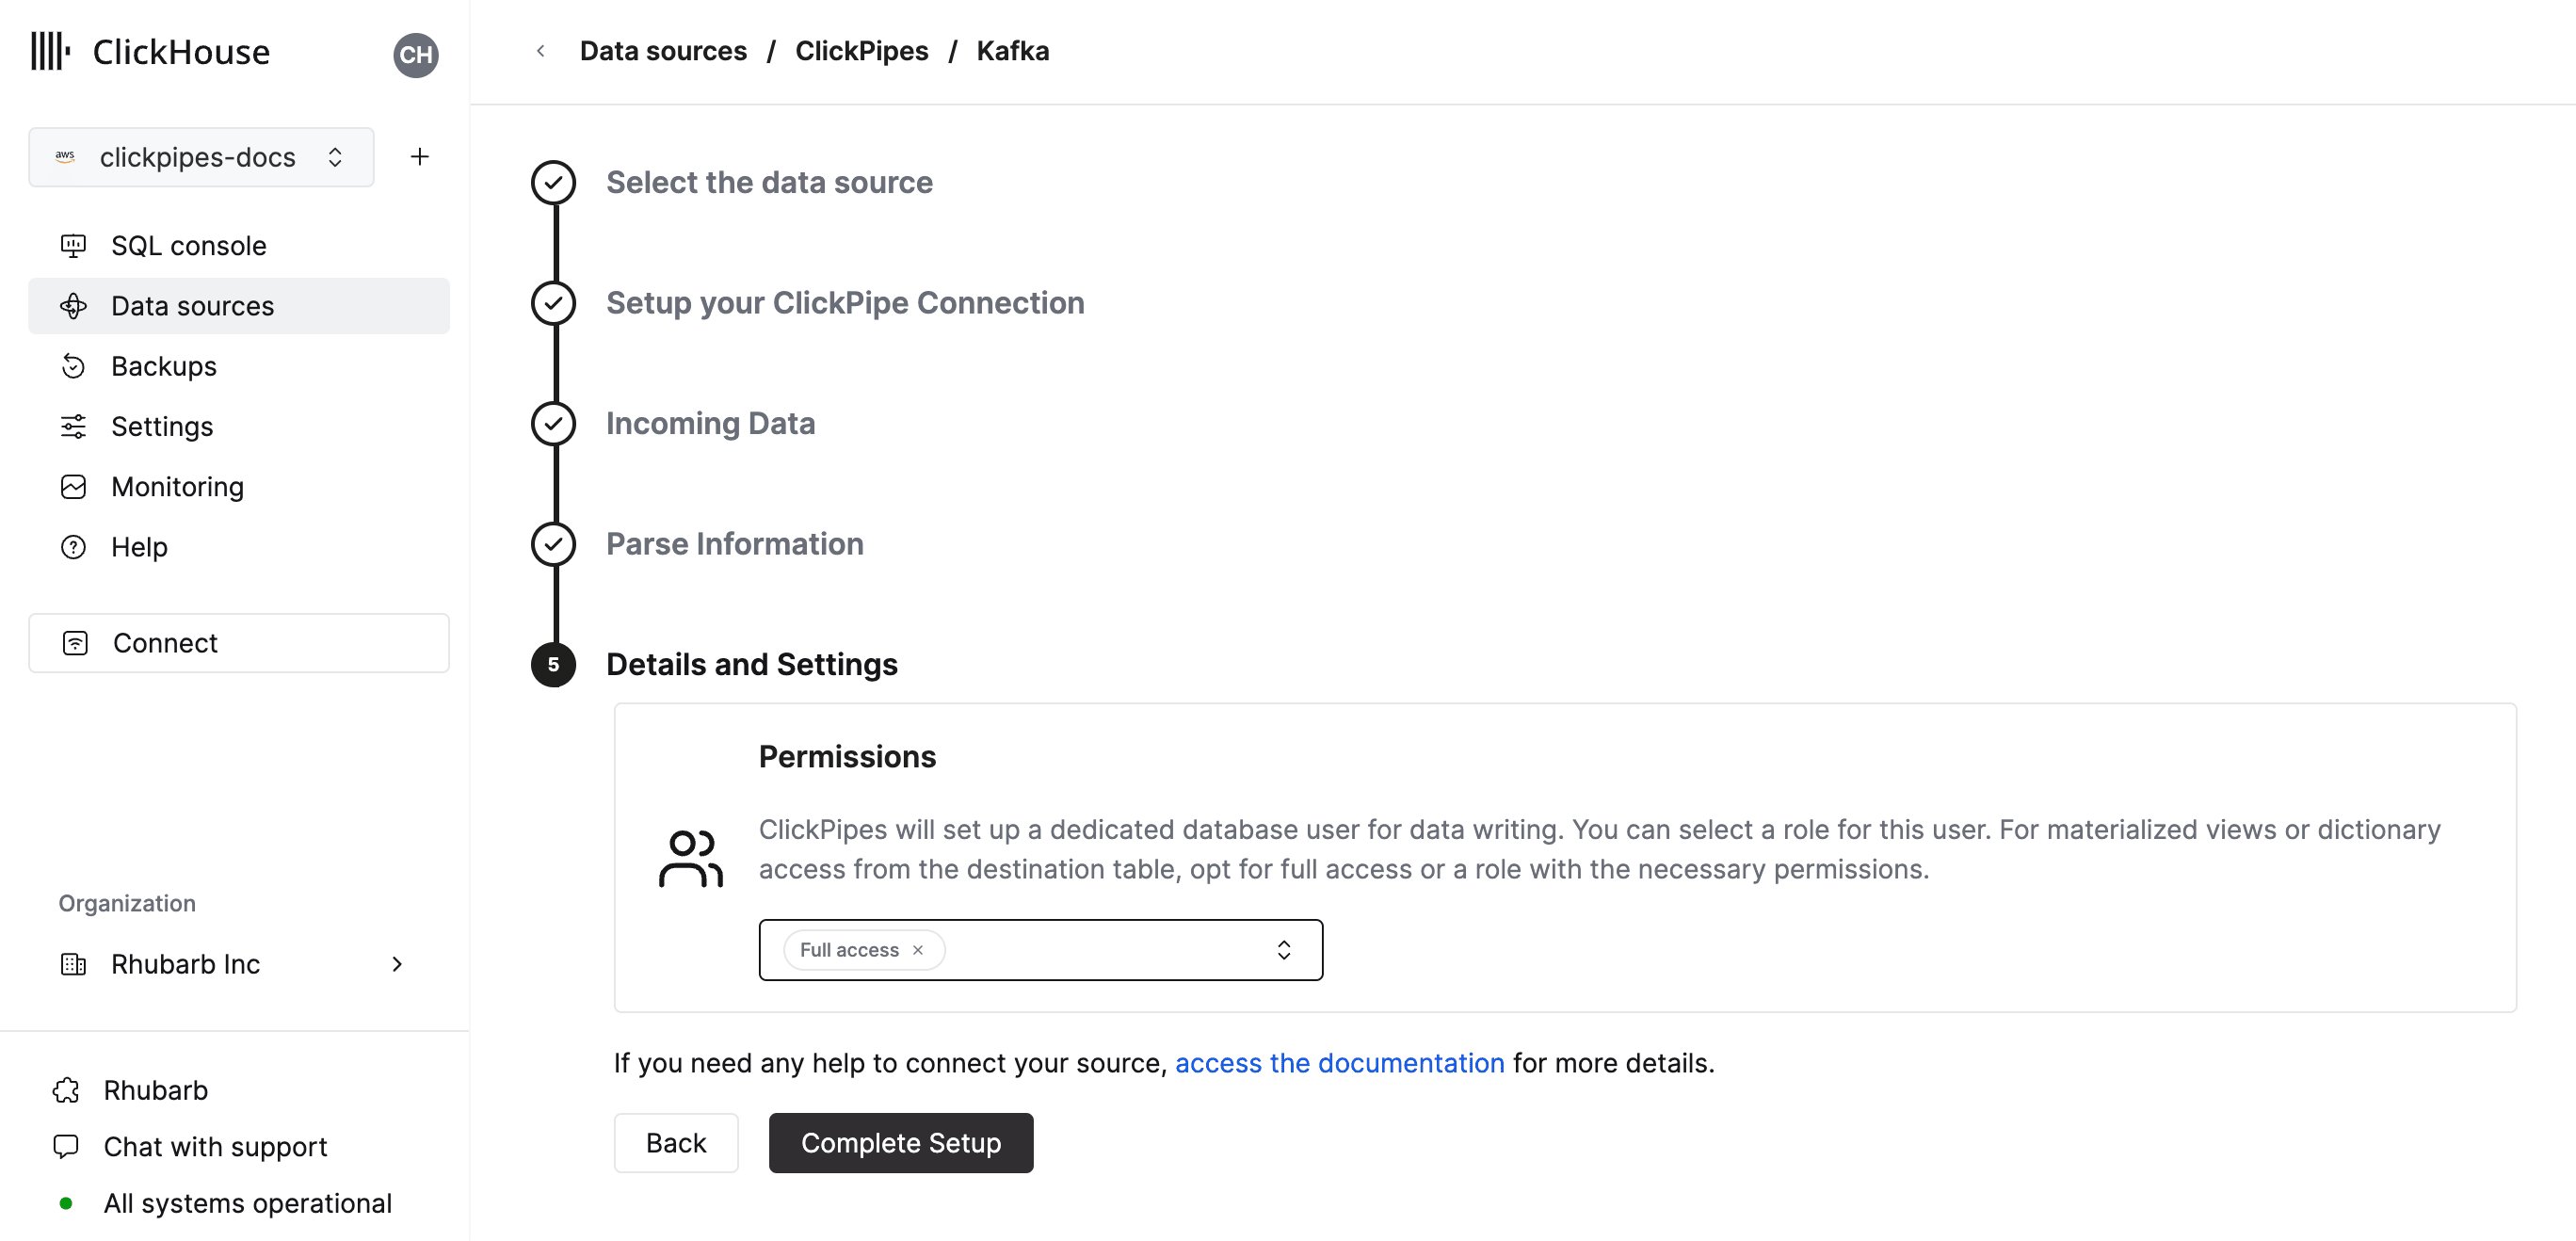
Full access: with full access to the cluster. Required if you use a materialized view or dictionary with the destination table.Only destination table: withINSERTpermissions to the destination table only.
6
Complete setup
And you’re all set! ClickPipes will first perform an historical backfill of all files in the specified path and then start ingesting new files as they land in the bucket.